
How to grow kratom cuttings – A guide from a customer

How to grow kratom cuttings – A guide from a customer
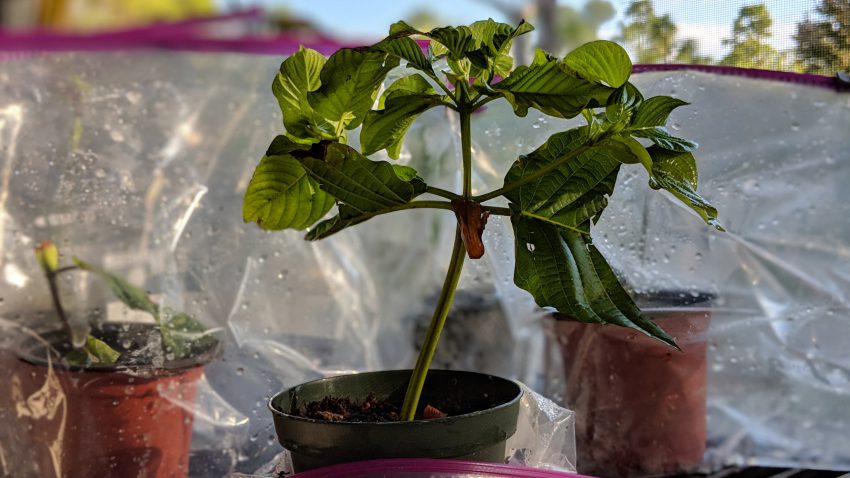
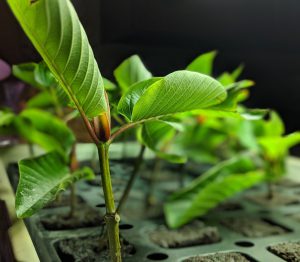
How to grow kratom cuttings – A guide from a customer – “I have a grow tent on an 18hr per day 300W LED schedule. They took about three weeks to root, and they went from now roots to tons of roots in like 2 days.
I put them in small pots about that size and all of my plants are in Fox Farms Ocean Forest and get fertilized with their liquid fertilizer 1x per week. I use ceramic watering devices to give my plants a steady drip of water, and I mist about 2x daily. The tent also has a humidifier running 24/7 so they are staying at like 80% humidity and >= 75 F at all times. “
Setup instructions
It is important to note to make is: Do not grow these plants like other types of plants. For example these are not tomatoes and will not thrive in the same conditions tomatoes grow in. These Kratom cuttings are rain forest trees. Kratom trees require high heat, high humidity, and lots of water.
How often should I water unrooted kratom cuttings?
How often should I water unrooted kratom cuttings?
Customers should leave the plastic bag these cuttings come in sealed at all times they should not be releasing moisture. There should be no need to water these cuttings. In the event the soil medium begins to firm up it is advised to mist or pour a table spoon or two of water. The soil medium should always be moist to the touch at all times. Even one night of a dried up soil medium will kill a plant seeing as they are so young. You can also mist the cuttings with a water bottle.
Flowering Kratom Cuttings?
Flowering Kratom Cuttings?
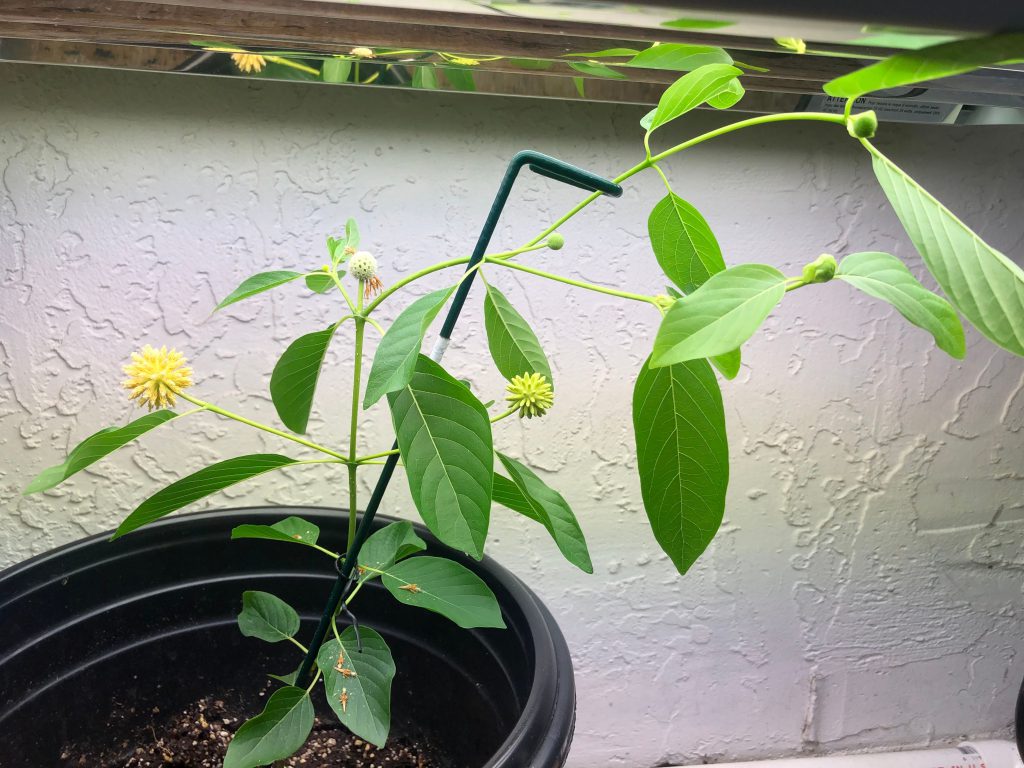
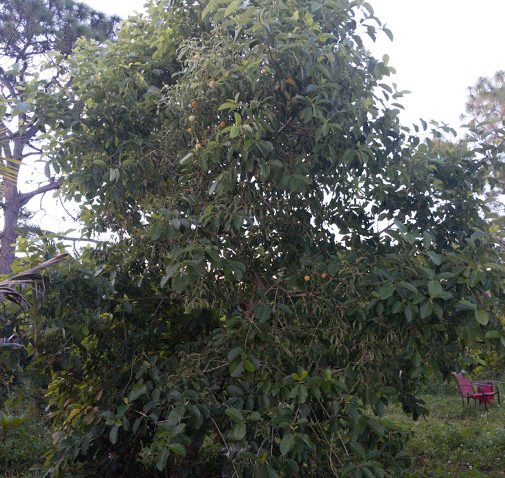
We would like to highlight the possibility that your cuttings could flower. This is a blog post from one of our customers showing off her kratom cutting. It ended up flowering at 3 months old. And again at 10 months old. If this happens with your cuttings please contact support so we can help document your cutting.
How to repot a kratom cutting?
How to repot a kratom cutting?
This video shows how to repot a kratom cutting. You begin by filling the pot with soil. Make sure to leave room for your cutting. Then plant inside the soil. Cover the top with a bit of soil and water. Your all done
How to root kratom cuttings – Peat Pod/ Soil Method (2nd Method)
Peat Pod/ Soil Method (Other Method)
For best results inflate the zip lock bag and place it under a strong indirect light source. We get decent results just relying on a South facing window but see much better results under some sort of bright indirect light (LED, Fluro, HPS). The Kratom Bible is available here on the #kratomAPP
Rooting
Typically takes up to around 3 weeks for the cuttings to begin to root.
Watering
If the ziplock bag stays sealed water loss will be almost nothing. Misting our pouring a table spoon or two of water in there when the pod starts to firm up is recommended.
Lighting Options
Artificial lighting methods allow for quicker rooting. However a South facing window will suffice.
Repotting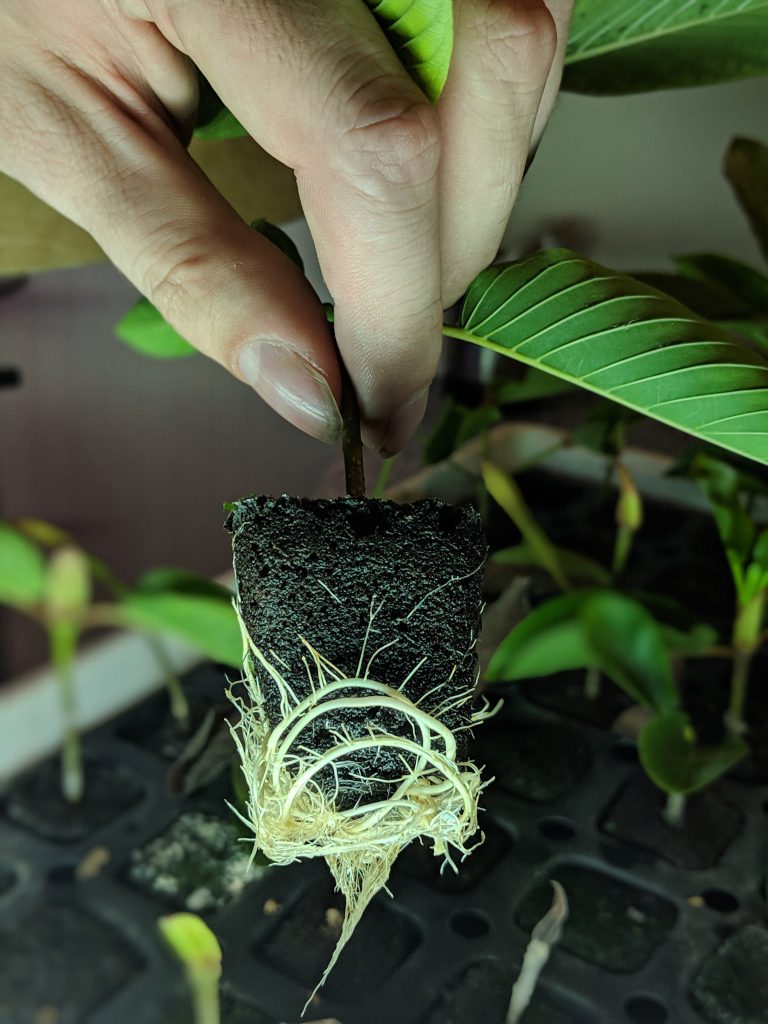
Once your cuttings establish roots, you will want to move them to a 3inch pot. Plant the entire pod and rootball in the new pot (potting soil works best).
Note from the grower
Your unrooted cuttings have already been cut back to the freshest node, and covered in rooting hormone.
How high should the humidity be?
Lastly, we add the cutting to a plastic Zip Lock like bag or you can take them out and put them into a very large plastic container. Regardless of how you are rooting them you need to ensure that the plants are kept in high humidity at all times. Do not leave the cuttings out of the bag for more then 20 min at a time. These plants require 80 – 100% humidity at all times.
Best Method to Root Kratom Cuttings – Water Jug Method
Best Method to Root Kratom Cuttings – Water Jug Method
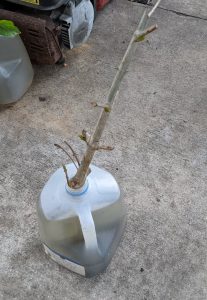
Take your cutting and place it inside of a 1 gallon jug of rain or pond water. DO NOT USE regular store water or water from the tap.
For more information on unrooted kratom cuttings. Check out our WIKI guide.
Best Method to Root Kratom Cuttings – Water Jug Method
Rooting
Typically takes up to around 3 weeks for the cuttings to begin to root.
Watering
Add 1 gallon of rain or pond water to your gallon jug. DO NOT USE regular store water or water from the tap. There are chemicals that will kill the plants. Check your water levels once a week. Replace any water that has evaporated from the jug.
Cuttings
You can add as many cuttings to the gallon jug that will hold at the top. However we recommend only a few per gallon. As this will make it easier to inspect and remove your cuttings without damaging any roots on the other cuttings. Roots are quite fragile and will come off easily. If your cuttings do not touch the bottom on the gallon that is fine. You only need 1/3 of the cutting to be above water. Anywhere that the water touches, roots will develop over time.
Lighting Options
Artificial lighting methods allow for quicker rooting. However a South facing window will suffice.
Repotting
Once your cuttings establish roots, you will want to move them to a 3inch pot. Plant the entire pod and rootball in the new pot (potting soil works best). Here are some videos to help you.
Roots
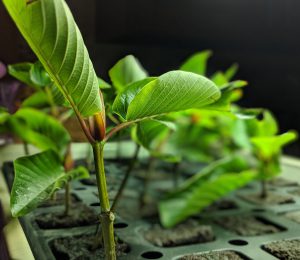
While examining your cutting you will notice that anywhere the water is touching. Any wooded growth will turn into green new growth. After a while in the water it will develop white little bumps. These are roots. They will turn into little white worms. We recommend letting the roots gain a bit of length before placing them in soil.
Note from the grower
Your unrooted cuttings have already been cut back to the freshest node, and covered in rooting hormone.
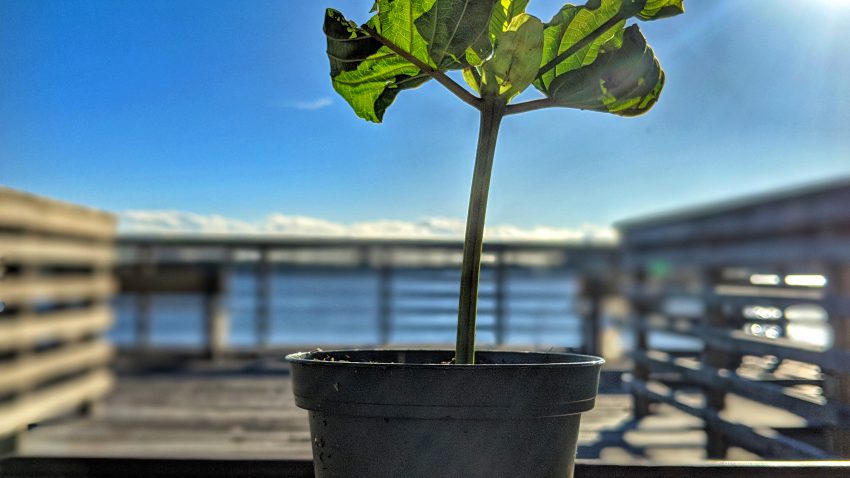
While in the water jug. The leaf on the cuttings will look droopy. This is normal. This is due the water evaporating.
Processing Unrooted Kratom Cuttings – How to Guide
Processing Unrooted Kratom Cuttings – How to Guide
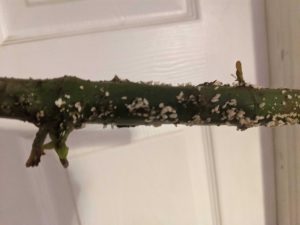
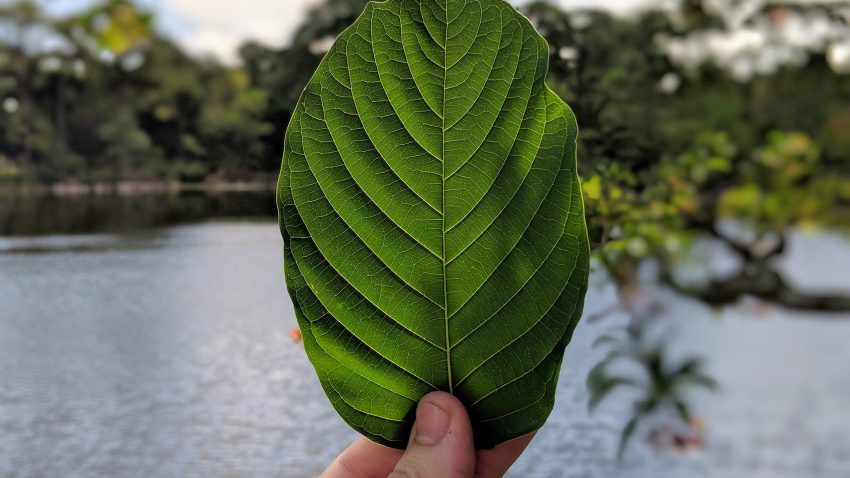
Process Unrooted Kratom Cuttings – How to Guide – When we process our kratom cuttings we always follow the same process. First, we take the cutting off the tree and clean the nodes and extra leaf off of each cutting. It is important to note that kratom cuttings do not require leaf on the cutting to produce roots. In fact, having large leaf on a cutting can be a disadvantage as leaf requires larger water consumption from the cutting. This is why we cut our leaf into a triangle shape.
Process Unrooted Kratom Cuttings – How to Guide
The next step requires adding rooting hormone. We have found that the best way to ensure rooting is to use a lot of rooting hormone. As much as possible. We strive to ensure that each cutting has the highest success rate possible. After adding rooting hormone the next step is to place the cutting in the soil medium. Wither it is peat pods, soil, or peet pods a good soil medium will be required to allow these plants to succeed. You can even grow these plants hydroponically, however we will be providing the rooting medium. If you are planning to grow hydroponically do add more rooting hormone after taking out of soil medium. Buy Unrooted Kratom Cuttings.
Hand pollinating fresh kratom seed pods
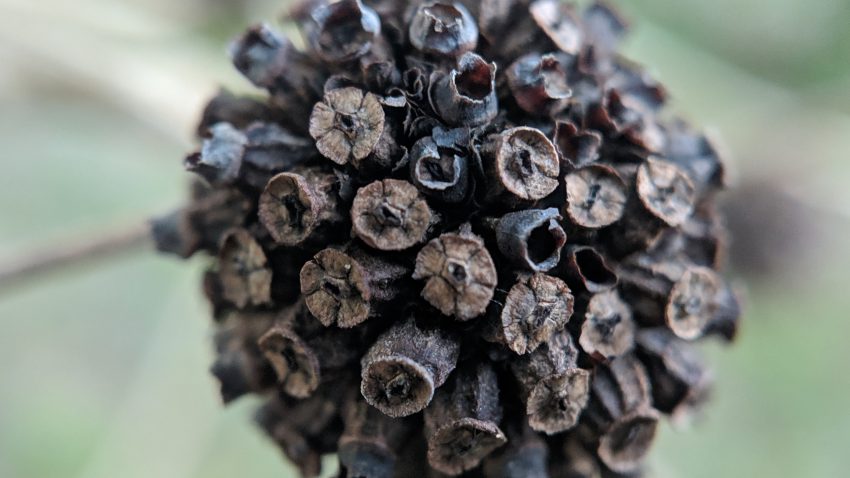
Hand pollinating fresh kratom seed pods
Hand pollinating fresh kratom seed pods
Processing Unrooted Kratom Cuttings
Processing Unrooted Kratom Cuttings
Processing Unrooted Kratom Cuttings- Here is a video showing our team processing some new kratom cuttings.
How to pay with Open Node
How to pay with Open Node
For payment with money order please proceed with your payment as normal. You will receive a email with your invoice. And one of our staff will contact you as well to ensure a smooth process. You can send your payment to our offices at:
How do I complete a Bitcoin checkout?
Completing a Bitcoin checkout may seem intimidating at first, but it’s actually quite easy once you know what you’re doing. All you need to know are these three simple steps.

How to pay with Open Node
Step 1: Select between On-chain or Lightning
On-chain
The phrase “On-chain” refers to the fact that you are making a Bitcoin payment on the Bitcoin blockchain, as opposed to a second layer solution (like Lightning). Paying on-chain is the original way to pay with bitcoin. Therefore, if you don’t know if your wallet is a Lightning Network wallet or not, you should assume that it’s an on-chain wallet and keep the toggle set on “On-chain”. You can learn more about on-chain wallets here or here.

Lightning
“Lightning” means your paying from a Lightning Network wallet. The Lightning Network is a second layer of Bitcoin that has significant useability improvements over On-chain, such as lower cost payments, quicker settlement times, and minimum payments as low as a single satoshi. Lightning payments require a wallet that supports Lightning Network payments. If you are using a Lightning Network wallet, keep the toggle set on “Lightning”. You can learn more about Lightning Network wallets here or here.

Step 2: Choose how to pay with your wallet
Once you select if you want to pay with On-chain or Lightning, there are three ways to complete a Bitcoin checkout.
Open with Wallet
If you are using a device, either on mobile or desktop, with a wallet application installed on it, you can tap “open in wallet” and the Bitcoin checkout will complete the payment inside the wallet application. This is the quickest way to complete a Bitcoin checkout if you are using one device with a Bitcoin or Lightning Network wallet application installed on it.
Scan QR code with mobile wallet
If you have a mobile wallet set up on your smart device and are viewing the Bitcoin checkout on a separate device, you can scan the QR code with the camera on your smart device. This is the easiest way to complete a Bitcoin checkout if you are using multiple devices.
Copy and paste the BTC address wallet manually
Alternatively, it is possible to copy and paste the Bitcoin address directly into your wallet application, regardless of what device you are using.
Step 3: Complete the transaction in your wallet
Once you select a checkout method, either “open in wallet”, scanning the QR, or copy and pasting the bitcoin address, you must finish the transaction in your Bitcoin or Lightning Network wallet.
Viola! That’s it!
Recent Comments